Ok, so arguably, chili is not something you want to eat in the heat of summer, but I figure, if I'm already perspiring because of the humidity then a little extra heat in the kitchen can't hurt. Plus, this is a great way to use all those summer veggies you have laying around.
Black Bean and Chorizo Chili
Since it's summer, I like to use fresh corn in this recipe, just note that you add it near the end of cooking to preserve some of it's sweetness. Feel free to adjust the amount of chicken stalk, the original recipe didn't call for any but I found the final product was WAY too dry and thick without some added liquid.
Note: This makes 12 cups, so feel free to cut in half!
cooking spray
2 1/2 cups chopped onion, divided
1 1/2 cups chopped green bell pepper
1 1/2 cups chopped red bell pepper
5 garlic cloves, minced
3 links Spanish chorizo sausage, diced (about 6 1/2 ounces)
1 1/2 tablespoons chili powder
1 tablespoon ground cumin
1 1/2 teaspoons dried oregano
1 tablespoon fresh lime juice
1/8 teaspoon ground cinnamon
3 (15-ounce) cans black beans, drained
3 (14-ounce) cans whole peeled tomatoes, undrained and chopped
2-3 cups chicken stalk
1 (8 1/2-ounce) can no-salt-added whole-kernel corn, drained
or
3 fresh ears of corn, corn kernels cut from cob with sharp knife
1 1/2 ounces semisweet chocolate, chopped
3/4 teaspoon salt
1/2 teaspoon black pepper
Toppings
Sour cream
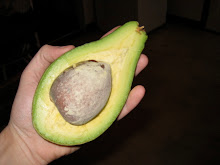
Avocado
Chedar Cheese
Hot Sauce
Heat a large Dutch oven coated with cooking spray over medium-high heat. Add chiles, onion, bell peppers, garlic, and chorizo; sauté 5 minutes or until tender. Add chili powder and next 7 ingredients (chili powder through chicken stalk), stirring to combine. If you're using canned corn, add now. If you're using fresh corn, reserve for later addition.
For Canned Corn: Bring to a boil. Reduce heat, and simmer, covered, 30 minutes, stirring occasionally. Remove from heat; stir in chocolate, salt, and black pepper.
For Fresh Corn: Bring to a boil. Reduce heat, and simmer, covered 20 minutes. Then add fresh corn and simmer additional 10 minutes. Remove from heat; stir in chocolate, salt, and black pepper.
Ladle 1 cup chili into each of 12 bowls. Top each serving with sour cream, avocado, and cheese (or anything else you feel like).
Cooking Light

Stay tuned for recipes from my recent summer vacation (i.e. cooking with my sister Sarah). Here's me munching on a carrot from her garden.